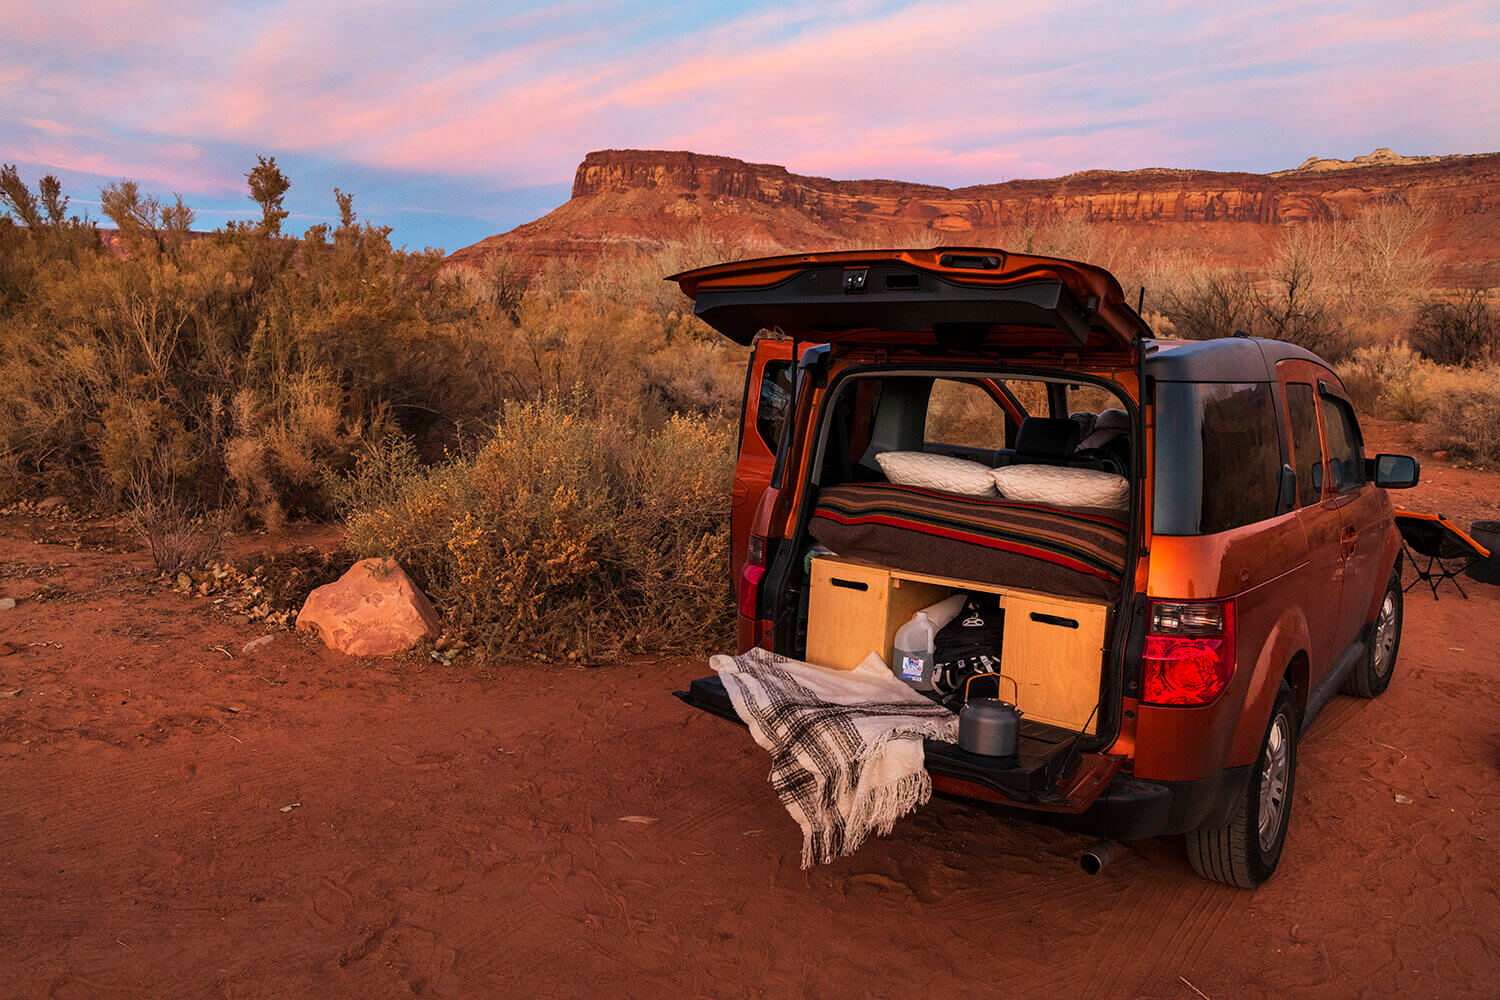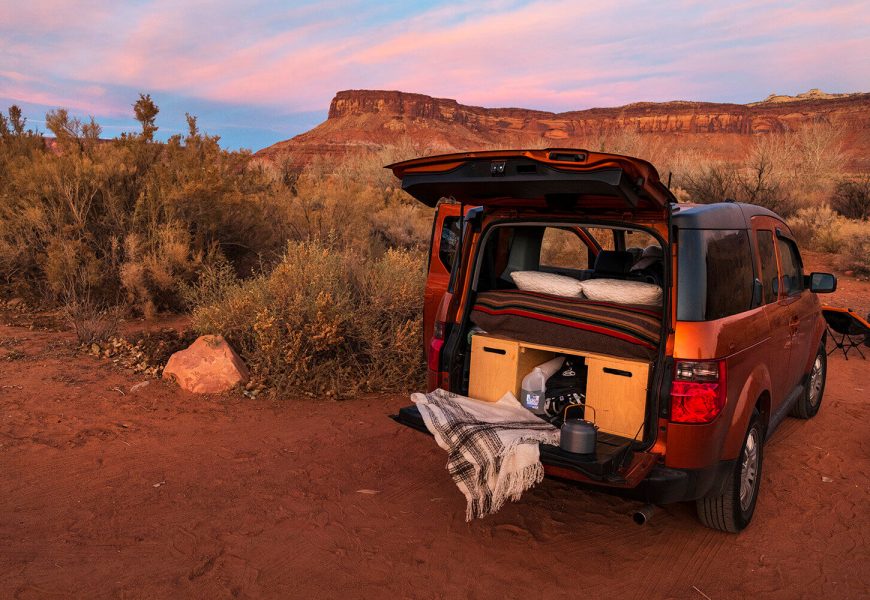
Have you considered converting a Honda Element into a camper? If you’ve not done so already, now is the moment! Honda Element campers are among the most stylish and adaptable in the market, available for full-time living, touring, camping, and van life.
Such vehicles are boxy, tough, and a lot of them have all-wheel drive. These vehicles offer lots of inside space for sleeping and are capable of traveling to almost any place! We will talk about Honda Element Camper Conversions ideas and how-tos in this article so if you are just learning about it or have been very interested in such a process for a long time, stay a bit longer!

Why is Honda Element Camper so Popular?
The Honda Element Camper has a great number of followers and fans. This automobile is so popular around the world because people can’t get enough of it! In fact, there are a quite a number of Facebook groups specialising in the Honda Element camper van, as well as a slew of YouTube DIY videos.
With its boxy form, broad bi-opening side doors and rear hatch with tailgate, and internal room, this vehicle is popular among campers and car dwellers. This car is simple to transform into a camper, has excellent gas mileage, and serves as a reliable everyday driver.
If you can’t (or does not want to) put money in a larger vehicle, this is the ideal vehicle to transform into a camper.
Aside from the roomy interior and opposed doors, many companies offer Honda Element camper replacement parts to make the procedure a lot easier. The Honda Element features a strong chassis, good ground clearance, and several models are available with all-wheel drive so that you can take it practically any place.
List of Amazing Honda Element Camper Conversion
Since it’s a wonderful, large sleeper and readily adaptable, this iconic SUV camper has won the hearts of countless campers and van lifers over the last decade.
Several Element versions come with available four-wheel drive, allowing you to go off-grid for some fun. Envision preparing a hot lunch on the tailgate in the midst of a fragrant forested area or on a sandy beach.
Honda Element camper adaptations are so simple to complete that you could buy a kit and go traveling the next day.
One can also construct a Honda Element conversion independently. So if you want to learn more about how people do it, keep on reading!
Here we have prepared a few conversions already done with Honda Element Camper by other people. It may help you get an idea on turning your car into a camper or just literally enjoy the fact that people were able to make such amazing campers by themselves!
You can watch the videos here:
- Honda Element Camper Conversion Tour: Van Life
- Honda Element Micro Camper
- Cute Boho Honda Element Camper
- Honda Element Camper Conversion: Solo Female Camper
- Minimalist Honda Element Camper Tour
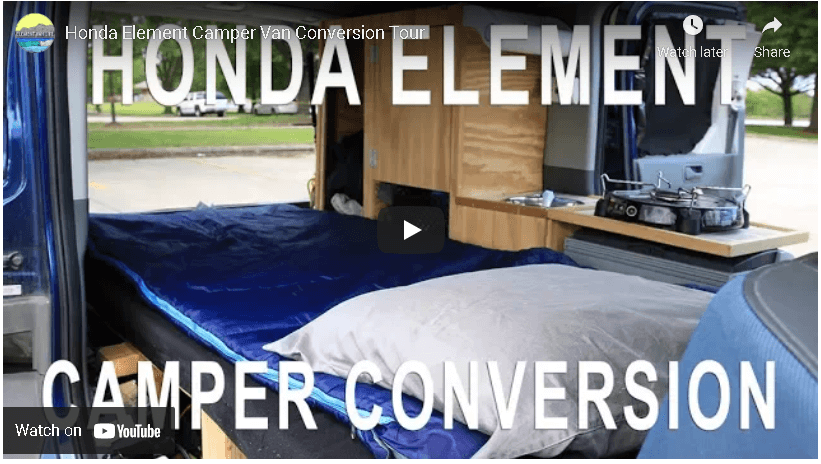
Honda Element Camper Conversion Tour: Van Life
Nate from Element Van Life resides in a Honda Element full-time and has made numerous changes to his Honda Element camper modification over the years. He provides a current peak at his 35 square foot house on wheels in this video.
And there is a roof rack just on top of the Element for surfboard storing as well as a 100-watt Renogy solar panel which feeds electricity to a 100 ah AGM battery within. The outside of this Honda Element hasn’t been altered in any way save for the addition of a roof rack. Upon that driver’s side of Nate’s Honda Element camper, there is a cabinet system with a closet and shelving for storing and food.
A compact sink and countertop, as well as a Dometic CF18 12v camping fridge, is situated near the cabinet.
The storage choices on this Element camper are plentiful. Nate can keep the passenger seat in the Element but still have a long sufficient bed surface to sprawl out on throughout the day, which also flips into a seat.
Following residing in his Element for a number of years, it definitely seems as though he understands what he was doing.
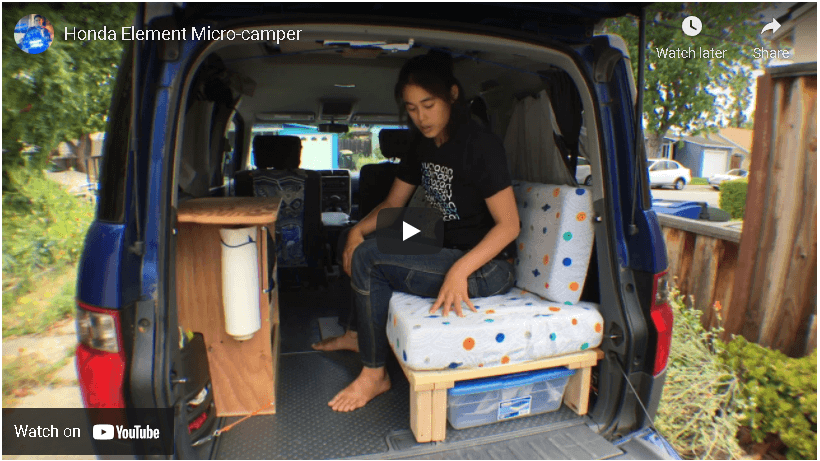
Honda Element Micro Camper
The modification of a Honda Element into a camper is fantastic. It’s designed for brief camping trips but can be readily removed for everyday use.
There’s a fold-out bed plus storage beneath, a table or food prep section on the opposite side, and more. The inside of the Element hasn’t been changed significantly. Everything comes apart effortlessly and is secured to the car’s framework with turnbuckles and tie-down loops.
This camper makes fantastic use of the room and appears to be very comfy. Amy wanted to make sure the bed was small enough for her to be able to sit up straight without hurting her neck and back.
This means there is much less storage capacity somewhere under the bed, but she will not really live there full-time, so it’s fine for her. She used an elastic cable to hang black-out drapes and velcro to enclose each window with custom-sized mosquito netting.
The handcrafted wood moonroof cover with a constructed iPad holder enabling watching films on the ceiling whilst laying in bed is among the nicest aspects of this camper and it would be so much better to see it in person!
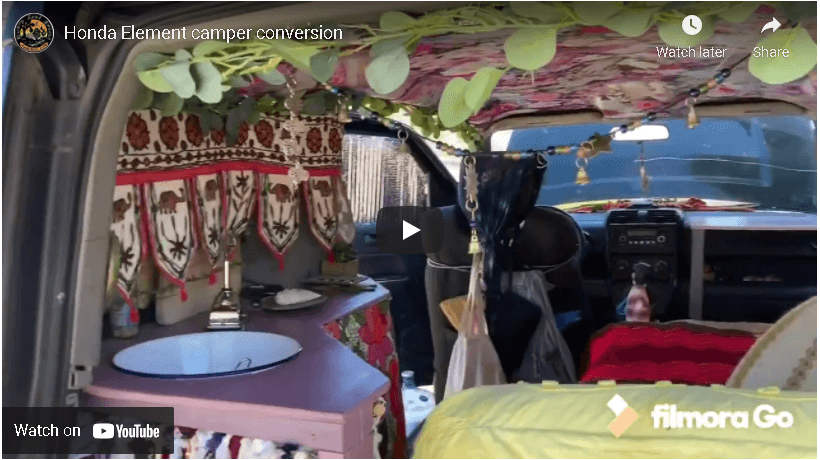
Cute Boho Honda Element Camper
Encelia is the name of this Honda Element micro camper modification. All of the design components in this Honda camper modification is actually very adorable and admirable. This lovely boho camper is a cheerful and comfortable spot to be because there are so many textures and patterns.
A lofted mattress with storage beneath, a sink and countertop area, and sometimes even room for a spare wheel are all included.
This Element campervan does have a hand pump for running water and a 6-gallon freshwater tank.
The solar panels on this camper transformation provide 100 watts of power to a Jackery power bank, which is housed where the passenger seat used to be. A desk and extra storage have been installed in lieu of the passenger seat.

Honda Element Camper Conversion: Solo Female Camper
Stephi lived in a Honda Element campervan full-time and had a basic and economical Honda campervan arrangement.
Most of her design would be a no-build, which means she used pre-made storage systems to maximize her Element’s space.
This camper is well-equipped, with storage drawers for food and clothes as well as hang storage for many other necessities.
For seclusion and insulation, she has bespoke reflective cut-outs to conceal and insulate all of the windows.
Stephi utilizes a Coleman camp stove for cooking. She does have a solar bathroom and LED internal lighting to glow the camper in the evening. With such a memory foam mattress, the bed base is a plank of wood supported by PVC foundation legs. There’s also a lot of space under the mattress.
The Honda Element is straightforward, efficient, and practical.

Minimalist Honda Element Camper Tour
The camper modification on this 2003 AWD Honda Element is simple and very much practical.
The wooden drawers that slide out of the back of the Element provide plenty of space in this simple camper.
The fact that this Element camper is so well-organized is one of its best features! Staying calm in stressful situations in such a small space necessitates organization.
The resting foundation is a gel memory foam mattress with a high-quality sleeping bag that makes up the majority of the Element’s rear.
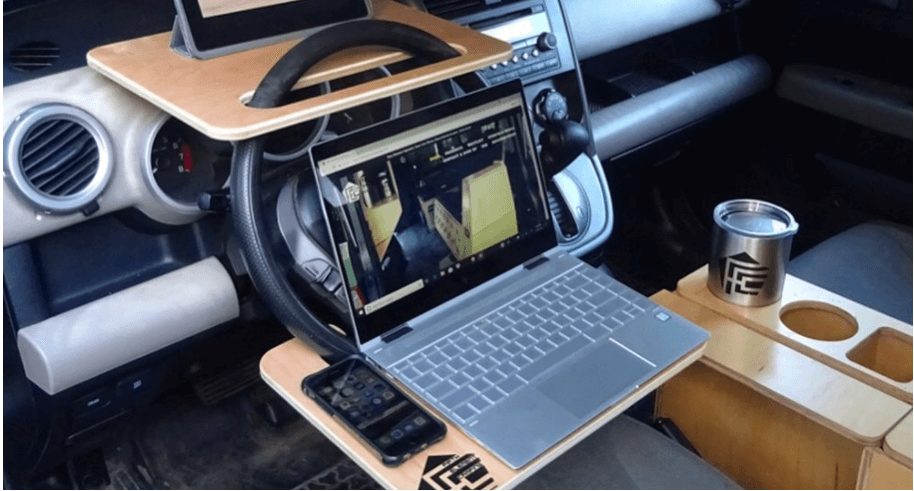
Brian, its owner, preserved the front passenger compartment and replaced it with a reclaimed wood center console.
You’ll see toothpaste there in the dashboard and a toothbrush protruding out from the air vent in this Honda Element camper conversion — you have to make do as much as possible especially if you live in a confined area!
DIY Honda Element Camper Conversion
Some of us really needed to discover ways to cut expenditures and minimize our expenses in order to travel and explore as often as we all want, especially if we are a huge fan of road and van life. Even as you enjoy staying in distinctive rental properties, your cost estimate does not always enable you to do so every night. Camping is a wonderful way to save money, especially if you’re going across numerous states.
Having said that, there are instances when you don’t want to deal with the inconvenience of packing and unpacking things. And then there is the climate to contend with. In light of all of this, one can even think about buying a 2006 Honda Element and embarking on a first campervan renovation project!
This type of conversion is very well-known in the community of RVers and campers. Of course, if you love to journey and go out and about as often as possible, you’d probably see this on the internet already or have been thinking about the idea for a long time now. Many people have already turned their own Honda Element into a camper. There are numerous YouTube videos out there and photos online that can give you a few inspirations.
But- if you are wondering how to do a self-made Honda Element Camper by yourself then we can teach you a few steps to prepare yourself now that you can do in the future!
As an example, we chose a simple design for this DIY camper. Some people can create a few wooden boxes that they may use as both storage and a platform for the camper. It is very easy to do and is also essential for those who still like to put their car components back inside anytime.
Planning
You may choose to use ideas found in the discussion boards at www.elementownersclub.com from @hotelement while studying how others had accomplished their own projects by themselves. You will learn how much the cut list for the wood can help you rather than trying to predict the measurements personally. If you want you can also check other online forums regarding DIY Honda Element Camper Conversions especially when it comes to knowing the dimensions you need for certain items to be done. We’re sure that you will find many!
Be sure that you also check the dimensions of your Element’s spaces and room at the back for the dimension so that you won’t find too many problems right when you’re about to put your platforms.
Equipment and Materials
After planning what you want to do to convert your custom Honda element camper, you should now prepare your tools and equipment. List down everything you need for this conversion so that you can grab all of them at once when you go to the store. Double-check everything!
Assembling
If you buy the 3/4″ pieces of maple plywood from a large box hardware store, they will slice the parts for you for a little cost. It’s critical to get exact, clean cuts for the box parts. Keep in mind the old adage, “measure twice, cut once.”
After you’ve cut all of your components, start pre-drilling holes for the wooden dowels that will help hold the box altogether.
You should also consider the sequence for which you put your components together. Some people say that starting with the longer side pieces attached to the lower piece of your box was the smartest method. You can use a tiny portion of wood glue for each of the predrilled openings and a drop of glue around the border of the two pieces where they would join.
After the dowels have been placed into the side pieces, gently move them into the bottom piece’s matching holes. Suppose all of it is perfectly flat and looks good, secure the pieces together with your clamp(s) while the wood glue begins to dry. Clean away any excess glue and give the wood glue at least 30 minutes to work.
The later part pieces needed to be attached next, but if you like to add some cutout handles you can also use a 1″ drill bit to create two circular holes around 6-8″ apart. You may then start to cut straight(ish) lines between both the two circular holes with a jigsaw. The cutting handles were made as a result of this, allowing me to easily grab and carry the containers once they were built.
You may glue and install dowels to be connected to both the bottom piece and the already attached side components now that the end pieces have handles. After that, carefully join your end pieces by running another bead of glue along the seams of the sides and bottom portion. While using dowels, it can be a bit tricky, and you’ll need to “muscle” these into place. Employ your clamp(s) to produce a solid bond once the end pieces are aligned and fastened with the dowels.
The one and only thing remaining are to use the utility hinges to join the box’s top component.
Before anyone could use it as a platform bed, you must complete one more step. Every box will require a suspension rail to allow for the additional 2 pieces of wood to be placed between them. One may wound up buying an extra 12″ piece of maple trim and cutting it to fit the length of each container. To attach the trim piece to each box, you can use three 1″ flat head wood screws.
You could now organize your containers and insert the two extra bits of wood between them to finish your platform bed with the supporting rails in place.
Finishing
Each box can now hold all of your camping and trekking equipment. Users can also choose to buy a lightweight futon mattress that will fit nicely in the available area underneath and make your resting condition much more comfortable.
A Goal Zero Yeti 400 Lithium Power Station is among the camping basics. Consider it a portable generator that runs on electricity rather than gas. This handy device allows you to use your CPAP machine all evening and rapidly charges all of your electronic devices while you’re out doing activities! You can also use the 12V Car Charging Cable to recharge it while driving.
Your Element camping is now very much achievable after this! If you find any more spare storage inside, you can fit more essential things to your specific needs and likings. With this setup, you may also put back your rear seats when you need them again. It’s very easy to use and also practical for those who like both camping and just plain traveling with their vehicle.
Honda Element Camper Conversion Kits
Looking for a simple solution to convert a Honda Element into a camper? The fastest and easiest way to do this is to get an Element camper conversion kit. Of course, if there is a solution for those who want to build their own Element camper, there is also one for those who prefer the easier way to have one.
These are ideal for busy folks who may not have the time or confidence to conduct a DIY conversion or who are afraid of power equipment.
If this is you then don’t hesitate to purchase a kit and put it together. It’s a lot less work than putting together an Ikea bookshelf.
Check out these fantastic conversion kits.
Fifth Element Camping
Starts at $4,995-$6,495
Searching for a flexible kit that lets you pick and choose the accessories you want to put in your Element? There’s a brand-new converter kit on the market. Fifth Element Camping created it.
Each piece of equipment is built of light plywood and has a contemporary, utilitarian, and minimalistic appearance. You can buy individual elements or choose from two different packages. Going with these spares you a lot of money, so it’s worth it if you’re planning a full-fledged conversion.
A bed/bench system, a cabinet with such a pull-out table, a kitchen with a side table, as well as a console featuring trays for the driver’s seat are the four primary components of the kit. One can accommodate a back seat in the back of the vehicle if you do not really construct the cabinet. So when the seat is installed, you can still utilize the mattress.
A bicycle mount and tailored pillows that fit the couch/bed exactly are among the alternatives. The entire set weighs 150 pounds. If you remove the back seats, which weigh 85 pounds, the vehicle only weighs 65 pounds.
They’re all plug-and-play and operate alone and together. The setup takes ten minutes and does not necessitate any long-term changes.
Although the headquarters of the company are in Asheville, North Carolina, they do transport, so customers won’t have to travel.
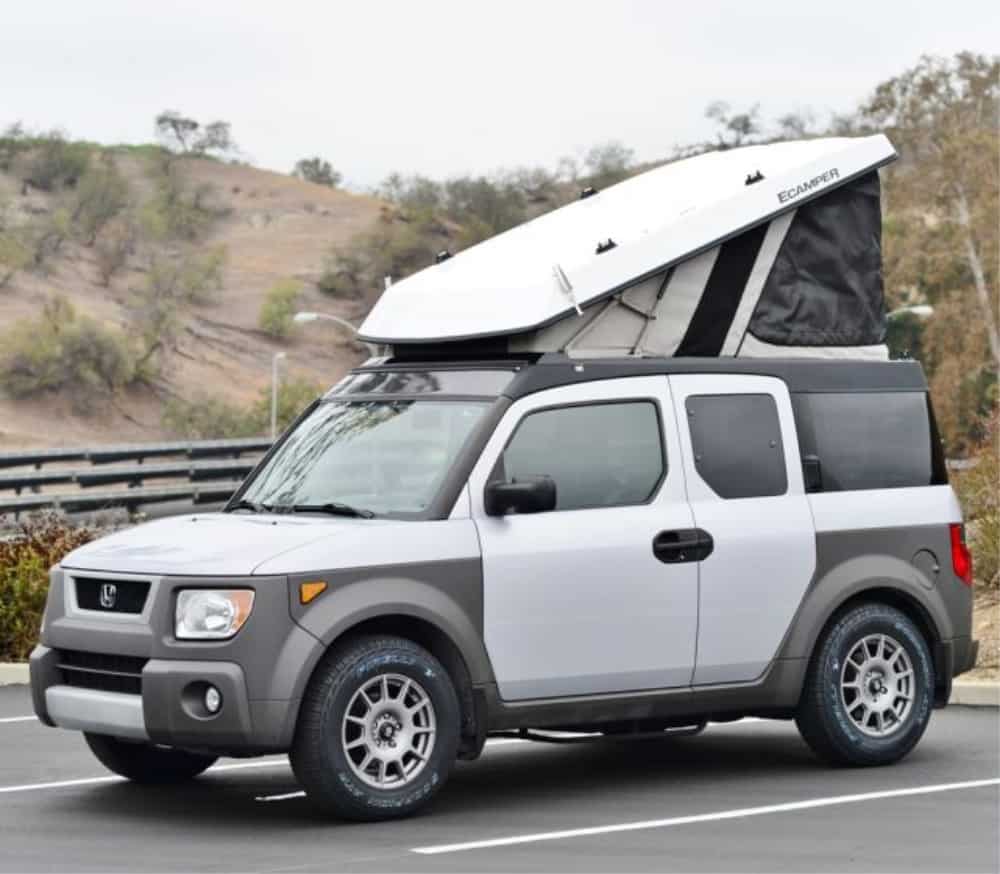
Ursa Minor ECamper Conversion
Starts at $7,000-$11,000
Do you wish you could stand up inside your Element camper? The Ursa Minor Honda Element modification kit is exactly what you need.
A pop-top sleeper for 2 people is included in this kit. The carbon fiber roof is lightweight and has a sleek form, adding only six inches to the car’s height and 130 pounds to its mass. This helps cut down on windage and lowers fuel consumption.
The pop-top of this Honda Element camper provides 6ft 6in of standing headroom and a nice 7ft by 4ft mattress while it’s open. Both the interior and outside of the vehicle have access to the sleeper. The pop-top walls are constructed of Sunbrella fabric, which is both weather-resistant and breathable.
If the Element has a sunroof, the pop-top assembly doesn’t require any cutting or drilling. Ursa Minor would only cut out that portion if it doesn’t.
The interior of the cab will be unaffected, so you may finish your conversion by adding a galley and portable toilet, leaving the seats in place, or using the cargo compartment to transport your belongings. It’s entirely up to you, which is one of the many advantages of this kit.
LED lighting, 12V outlets, a 60watt solar charging system, an exterior ladder, rack mounts, and anchoring points are among some of the choices.
Ursa Minor’s modification facilities are in Portland and San Diego, so you’ll have to go there. On the bright side, you won’t have to do anything for this conversion all the work will be done by them.
Wrap Up
A Honda Element camper will not betray you if you’re seeking a camper conversion that will enable you to go camping on the weekends or during vacations.
One can choose a temporary modification that slides out, freeing up the automobile during the week. Besides, you have options to do it by yourself or have yourself purchase a conversion kit- whatever fits your necessities and capabilities is very much available!
If you intend on being on the road comprehensive or for weeks or months, a Sprinter van or a Ford Transit are better options.